Creating a successful enamel pin design involves understanding the medium's constraints and possibilities. Here are some detailed guides to help you design an enamel pin:
Understanding Enamel Pin Types
-
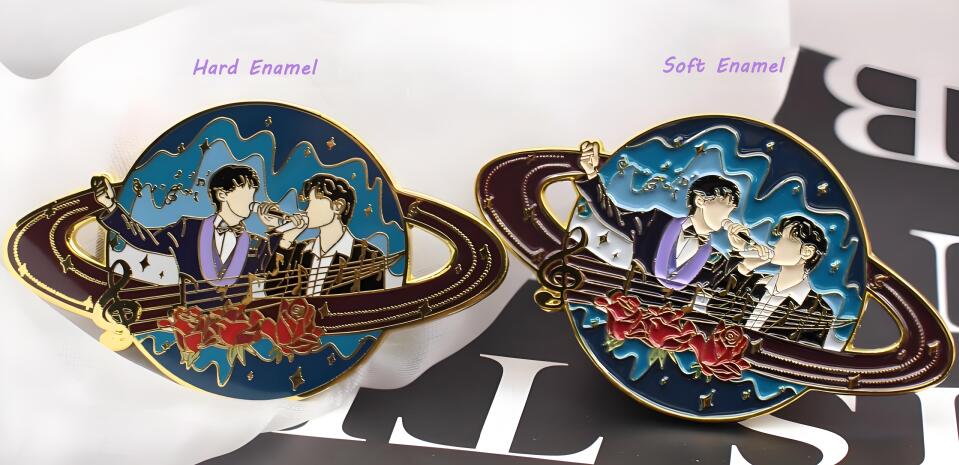
Soft Enamel: Pins have raised metal lines and recessed enamel. The enamel is applied and then baked, giving the pin a textured feel. They often have a more vibrant appearance due to the recessed areas.
-
Hard Enamel: Pins are polished flat after the enamel is applied, giving a smooth finish. They are more durable and have a higher perceived quality.
The Process
Enamel pins are essentially metal pins or badges made up of two main elements. Plated metal and enamel paint.
To make enamel pin, we will take your artwork and create a die which is used to stamp your design into a sheet of high-quality metal which is then cut out around the outline of your design. Keep your design simple and bold. Intricate details may not translate well to the small size of a pin.
The cutout shape is then plated in a choice of finishes; either gold, silver or, the most popular black nickel, before raised areas are polished to a quality finish and recessed areas are filled with enamel paint.
The colored enamel areas of your designs can be color matched using 'Pantone Solid Coated' color values. This ensures consistency across different production batches. Use a limited color palette. Enamel pins typically use solid colors with no gradients. Each color should be enclosed by metal lines. High contrast between colors helps make your design more legible and eye-catching.
Each color sits in its own recess with raised metal areas acting as a barrier, surrounding each color and preventing them from mixing together. Ensure lines are clear and distinct. Fine details can be lost, especially in soft enamel pins.
The enamel paints are then set using high temperatures before any additional finishes, such as resin domes, are added.
Technical Specifications
-
Size: Common sizes range from 0.75 to 2 inches. Consider how your design will look at these sizes.
-
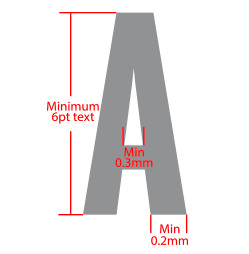
Minimum Raised Metal LineThickness: Lines should generally be at least 0.3 mm thick. Thinner lines may not be visible or may not hold up well during production. Each enamel color of your design has to be separated by a line of raised metal, which acts as a barrier, preventing colors from mixing together.
-
Spacing-Minimum Areas of Color: Ensure there is enough spacing between different elements of your design. A minimum of 0.3 mm is recommended to prevent colors from bleeding into each other.
- Text Size: The smallest text that we recommend using is 5pt. Please note that this is based on a plain font, such as Helvetica. More complex fonts will require a larger font size. When using text in your designs, please make sure that you follow the size rules for the minimum raised metal line thicknesses and the minimum filled areas of color.
Pantone Color Match
For the most accurate color matching, we recommend using the 'Pantone Solid Coated' guide. Clearly, indicate which areas of your designs you would like to be colored by using the correct color values when creating your artwork or by clear instruction when placing your order.
Design Software
-
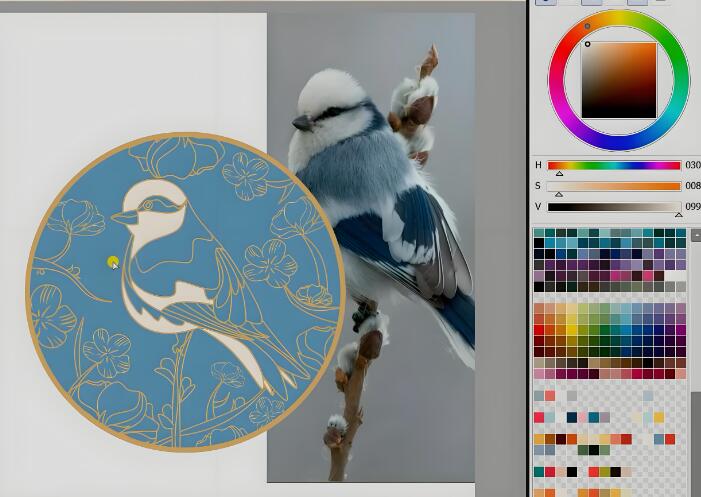
Vector Software: Use vector-based software like Adobe Illustrator or Inkscape. Vector files (.ai, .eps, .svg) ensure scalability without loss of quality.
-
Layers: Use layers to separate different elements and colors of your design. This helps in the manufacturing process.
Designing for Production
-
Metal Borders: Each color in a pin is separated by a metal border. Design your pin with these borders in mind.
-
Plating Options: Consider the type of metal plating (e.g., gold, silver, black nickel) as it affects the overall look of the pin.
-
Back Stamps: You can include a back stamp (text or logo on the back of the pin) for branding or informational purposes.
Review and Proofing
- Digital Proof: Before production, the manufacturer will provide a digital proof. Review this carefully to ensure accuracy. Submit Your Design and Get a free mock up!
- Sample Pin: For large orders, consider requesting a sample pin to check the quality and design translation.
And for those who weren't listening at the back...
- 0.3mm minimum raised metal line thickness
- 0.3mm minimum recessed area for enamel colors
- Minimum 5pt font size based on a plain font like Helvetica
- All text converted to outlines
- Use the Pantone Solid Coated guide for accurate colors


